Creating a responsive and dynamic website no longer requires extensive coding skills. With Microsoft’s Power Pages, users can now build professional websites using a drag-and-drop interface, making web design accessible to everyone. In this beginner’s guide, we’ll walk you through the basics of creating a responsive website with Power Pages, explaining its key features and offering a step-by-step tutorial on how to get started.
What is Power Pages?
Power Pages is a no-code web design tool from Microsoft, designed to simplify the process of creating responsive websites. Whether you’re a small business owner or a hobbyist, Power Pages enables users with minimal coding experience to create fully functional, responsive websites with ease. This tool provides all the essential features for web development, empowering you to build professional sites without needing a developer.
Key Features of Power Pages
Drag-and-Drop Interface
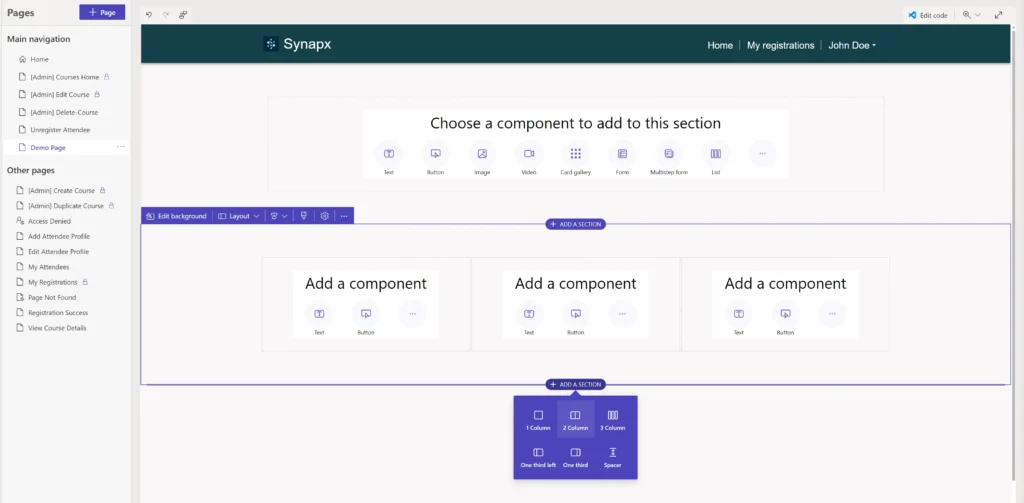
One of the most powerful aspects of Power Pages is its intuitive drag-and-drop interface, which allows users to easily assemble web pages. With pre-configured components available, you can design a website without writing a single line of code. This feature is perfect for beginners looking to create custom web layouts quickly and efficiently.
Templates and Pre-built Sections
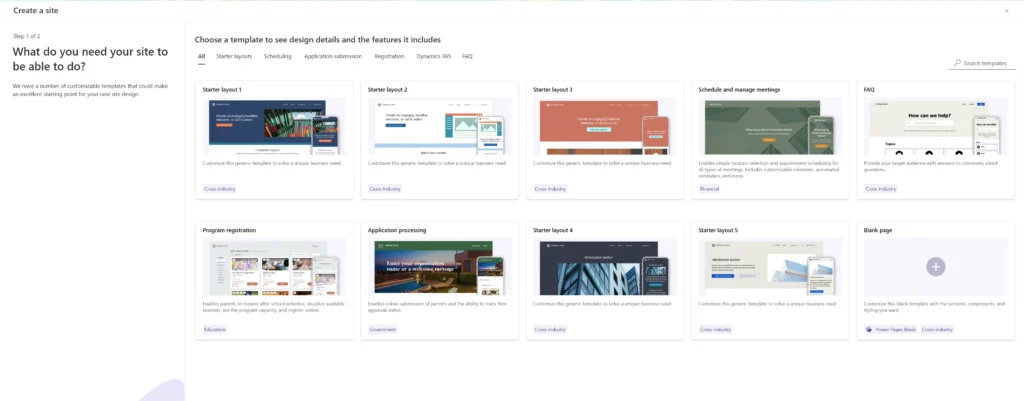
Power Pages offers a wide range of templates and pre-configured sections that accelerate the web design process. These templates cater to various industries and business needs, enabling users to select pre-designed layouts and modify them to fit their requirements. This functionality saves time and ensures that your website has a professional look from the get-go.
“With Power Pages, we’re not just simplifying website development and management; we’re enabling businesses to create online experiences that are both engaging and functional through standard and customised sections and layouts.”
Alex, Synapx CTO
Getting Started with Power Pages
1. Set Up your Account
To begin using Power Pages, you’ll first need to create a Microsoft account. After logging in, you can easily access Power Pages from the Microsoft 365 suite.
- Go to the Microsoft 365 website.
- Sign in with your existing Microsoft account or create a new one.
- Navigate to Power Pages under the Microsoft Power Platform.
Once your account is set up, you’re ready to start building your website!
2. Choose a Template
After setting up your account, the next step is to select a template that suits your website’s style. Power Pages offers a variety of templates that can be customised to fit your brand. Choose a template based on your industry or desired website style. Use the drag-and-drop editor to rearrange sections, add custom layouts, and incorporate responsive elements.
This step ensures that your website is both visually appealing and functional across different devices.
3. Utilise the Style Editor
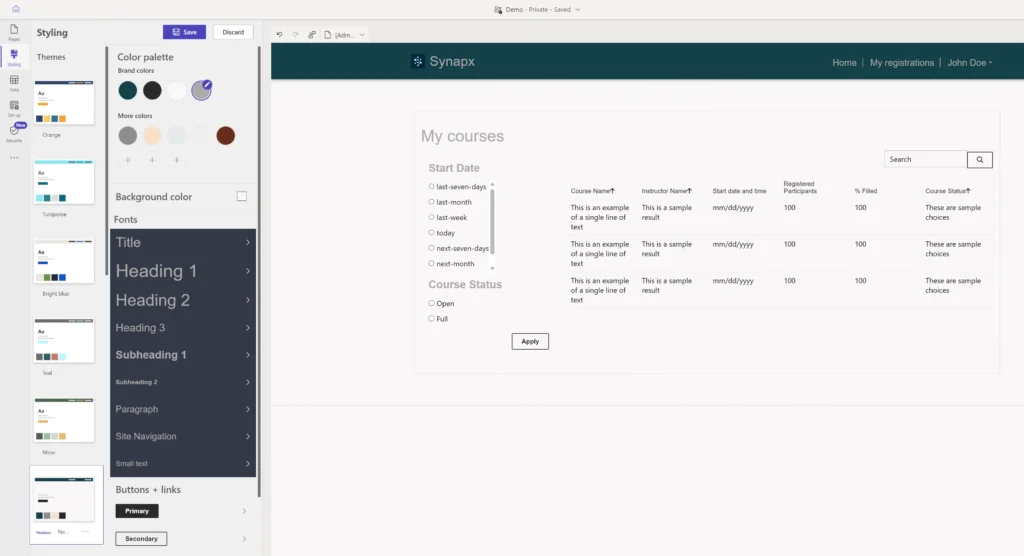
Power Pages comes with a built-in Style Editor that allows you to customise colours, fonts, and backgrounds, all without touching CSS. This editor provides flexibility to create a unique design while keeping things simple for non-developers.
4. Add Content and Media
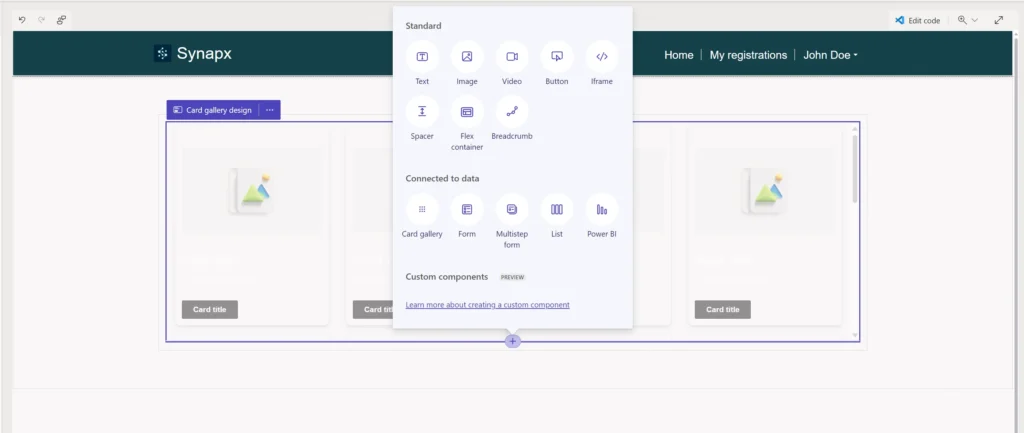
Adding content to your website is straightforward. You can easily drag text boxes and image placeholders into your design. To optimise your site ensure that your text is well-structured for easy readability and optimise your images for web performance by resizing them and using formats like JPEG or PNG.
For added engagement, you can embed videos and include interactive elements such as sliders or contact forms. These features can enhance the user experience by providing dynamic content that keeps visitors engaged.
5. Integrating with Other Services
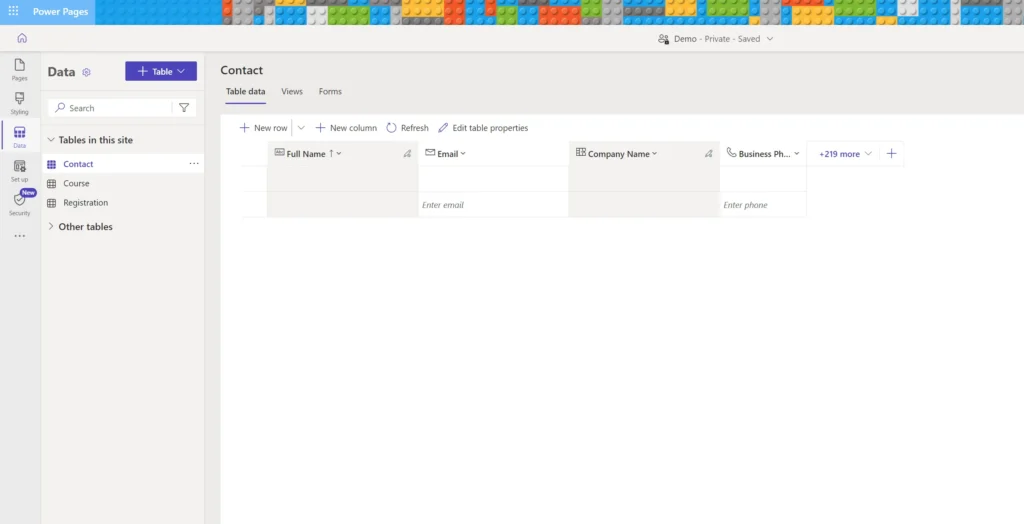
Power Pages integrates seamlessly with Microsoft Dataverse and other third-party services, allowing you to build data-driven websites without needing advanced coding skills. Whether you’re collecting data through forms or displaying dynamic content, these integrations can improve the functionality of your website.
6. Publish Your Site
Once your website is designed and content is added, it’s time to make it live.
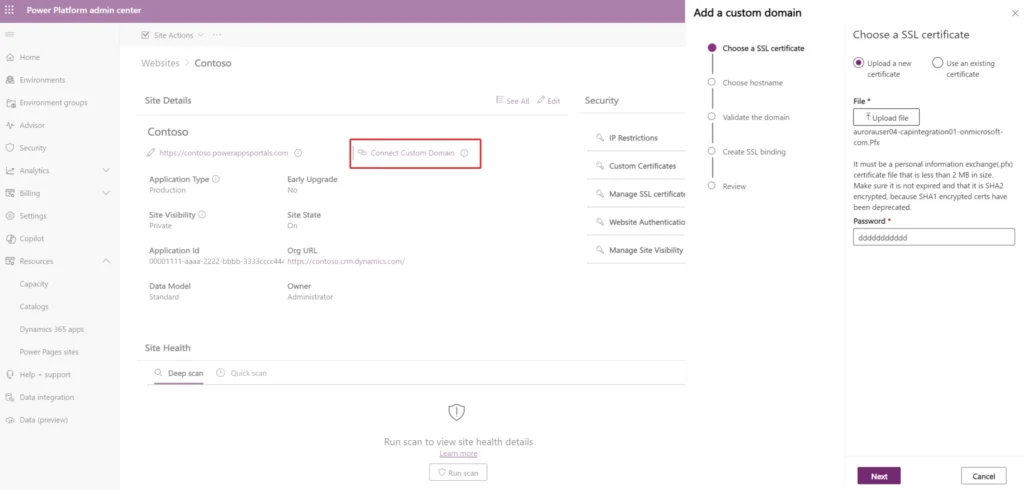
- Purchase a domain from a registrar if you don’t already have one.
- Use Power Pages’ domain setup tool to link your custom domain.
- Hit the “Publish” button to go live.
Basic SEO Considerations
Even as a beginner, you’ll want to consider some basic SEO practices to ensure your site ranks well in search engines.
- Use clear and relevant headings.
- Optimise your metadata (title tags and descriptions).
- Create an XML sitemap for search engines.
We’ll cover SEO in detail in another blog, but these are the basics to get you started.
Next Steps and Resources
Building a responsive website with Power Pages is easier than ever, thanks to its user-friendly design tools and integrations. As you gain more confidence, you can explore additional features like custom coding, integrating advanced services, or even enhancing site performance.
While Power Pages simplifies basic website creation, Synapx’s expertise becomes valuable when you require specific functionalities, complex customisations, or seamless integration with third-party platforms or the broader Microsoft ecosystem. We help tailor your site for enhanced capabilities like CRM integration, unique user flows, and data management.
“Our mission at Synapx is to provide businesses with the tools they need to succeed in a digital-first world, and Power Pages is a fantastic way to start that journey.”
Alex, CTO At Synapx
Synapx offers specialised support in building responsive, tailored websites, enabling businesses to utilise the full power of Microsoft’s no-code solutions. Contact us to see how we can help transform your online presence with customised sites, advanced integrations, and ongoing support.


